There is finally some downtime after Christmas to continue with the Eaglemoss/Die-cast Club Mercedes-Benz 300 SL build. Our first instalment gave you a specific acumen on who Eaglemoss is, their subscription service and what they provided us in the initial box of goodies.
So far, with instruction guides 1 & 2 under our belt, we’re sincerely impressed with the quality of parts, fit and finish and ease of assembly. The supporting instructions are very detailed and easy to understand. We recommend you do read their suggested tips too, usually found on the outer edge of the instruction booklet.
The commentary below will focus on instruction guides 1 and 2. The primary focus with #1 is to tease you with an introduction to the exterior body part of the 300 SL. In this case, we prep the front hood and iconic grille. We also complete the tire install; this is one of four all-metal rims. Instruction guide #2 is a little more challenging. We visit the interior instrument panel, start on the engine block, touch the crankcase and complete the front bumper…
A few tips we want to share. And by no means are we/I considered a professional model builder, though we believe these tips will come in handy throughout the build if you decide to tackle any of the offerings from Die-cast Club’s lengthy assortment of cars!
If you have any questions, please ask here; we’ll do our best to answer them.
A FEW TIPS:
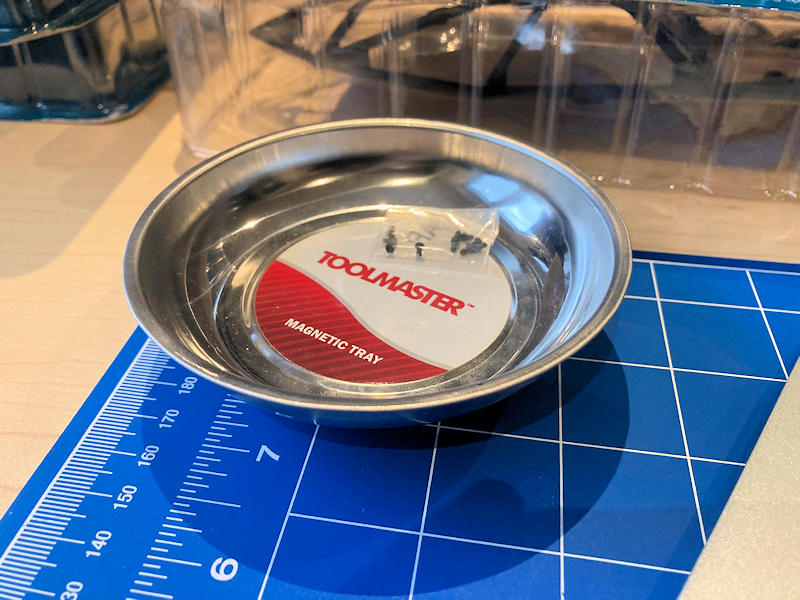
Get yourself a magnet tray! Use, add the latest screw size based on the step at hand and ensure the screws do not get lost. Also, you can use it to magnetize the screwdriver head to help secure the screw. Note, Die-Cast Club does go that extra mile and provides extra screws throughout the build. The added redundancy is peace of mind. The tray is cheap and readily available at any big-box store.
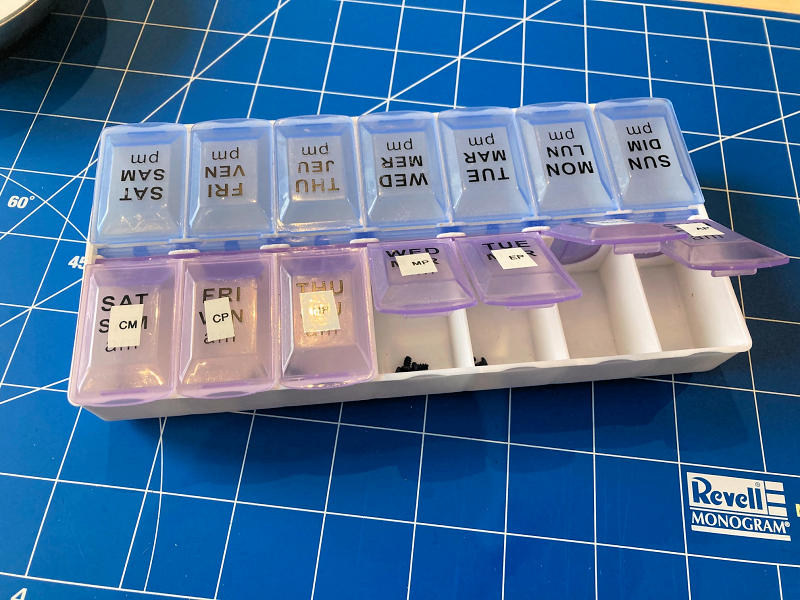
On the topic of screws, so far we encountered seven different screws used throughout instruction guides 1 & 2, we’re definitely sure there is a lot more! Get yourself a simple pill reminder case. Easily found at your local dollar store. You can temporarily label each compartment and secure each screw, so neither is lost or mixed.
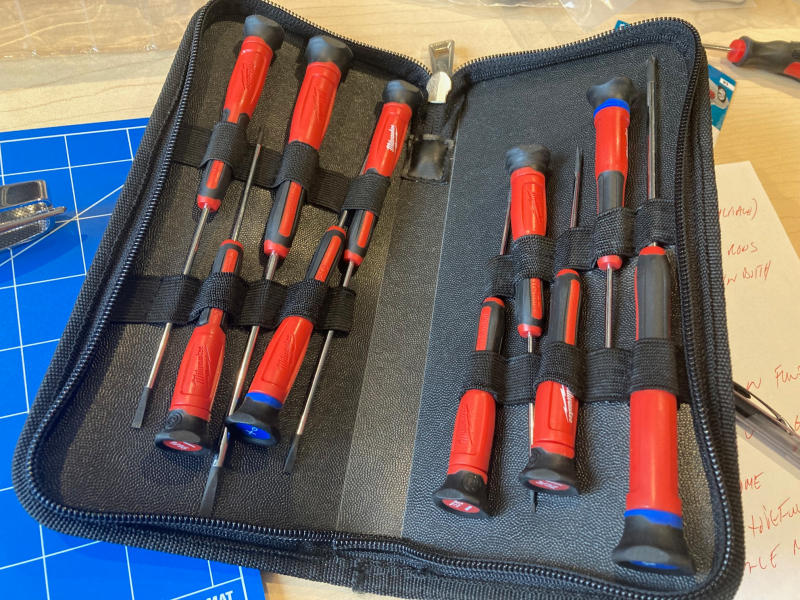
Lastly, and this is optional, as Die-cast Club does provide the required tools. If extra cash is available, invest in a good precision screwdriver set. The one pictured is from Milwaukee and provides a number of accurate and precise head types. It also comes in handy for day-to-day jobs, with the most important of them being removing your scale model from the packaging.
GUIDE #1:
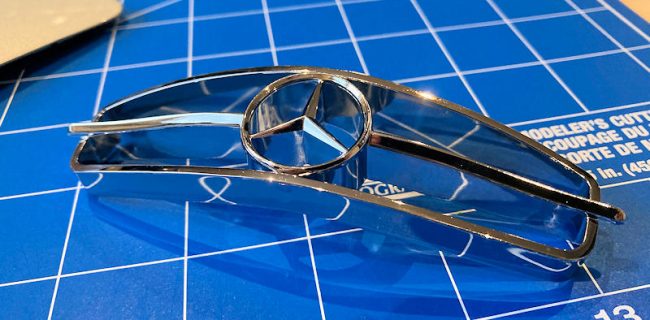
FRONT HOOD PREP/GRILLE
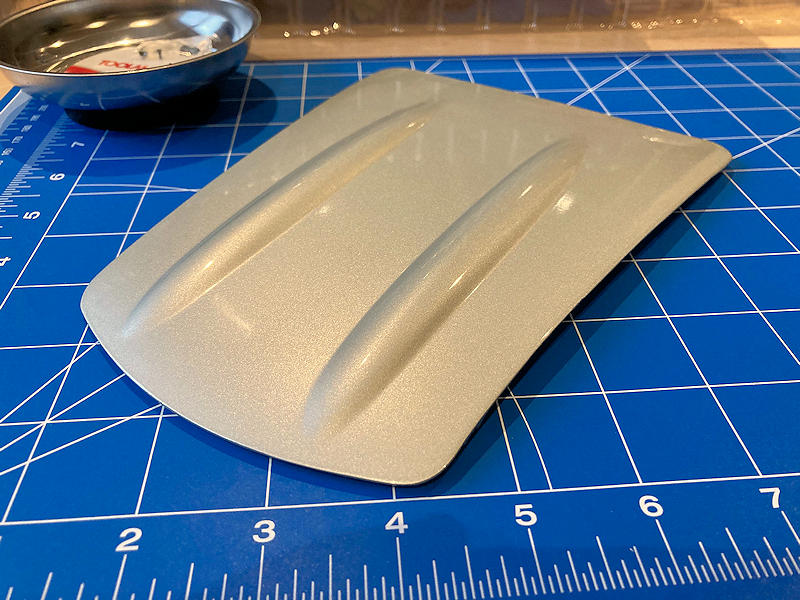
Before inserting the support rod, use it to first prep each opening – one of each side as indicated below. I found it went more smoothly this way. Also, do not forget to place a soft cloth underneath the hood to ensure you do not damage the paint.
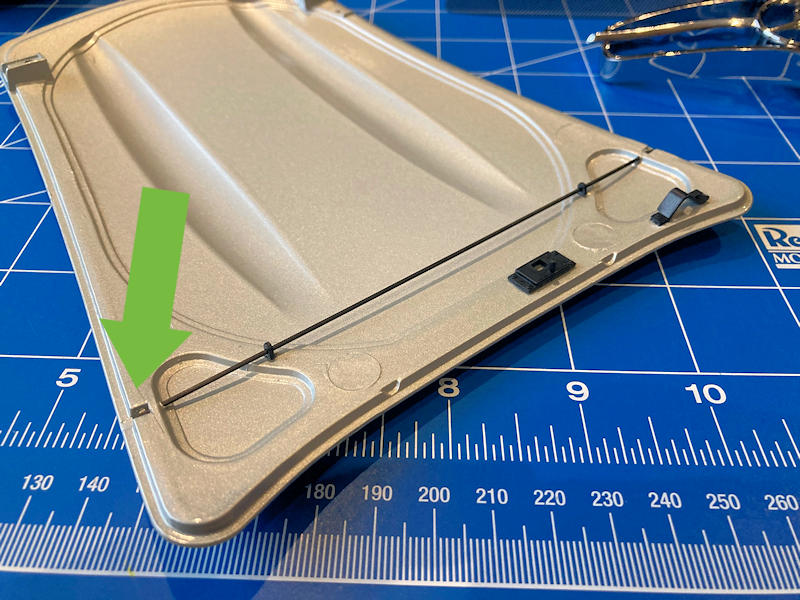
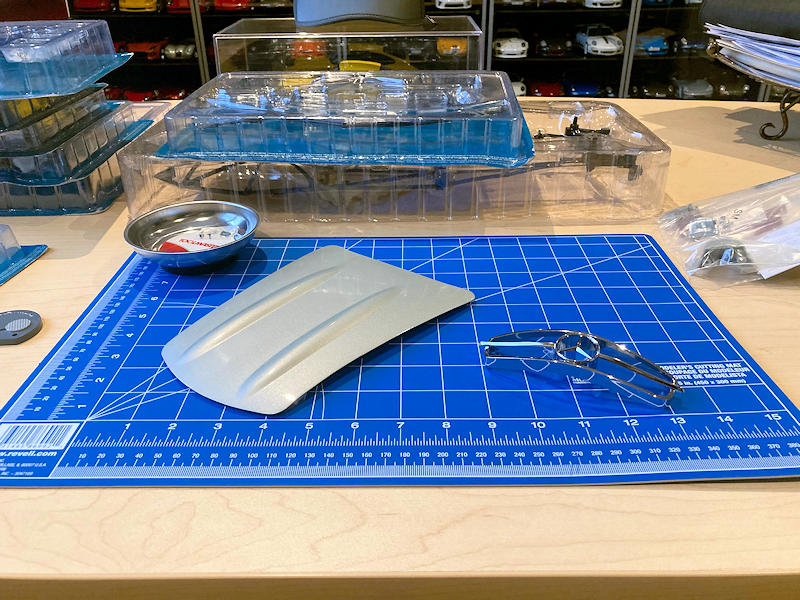
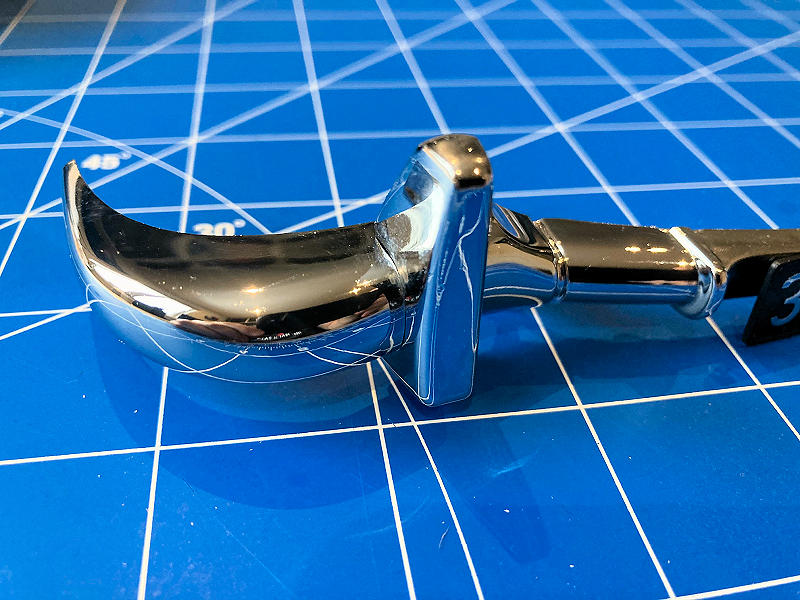
The Mercedes-Benz 300 SL hood is a metal part. Fabrication here is very good, along with the painted surfaces on the top and bottom.
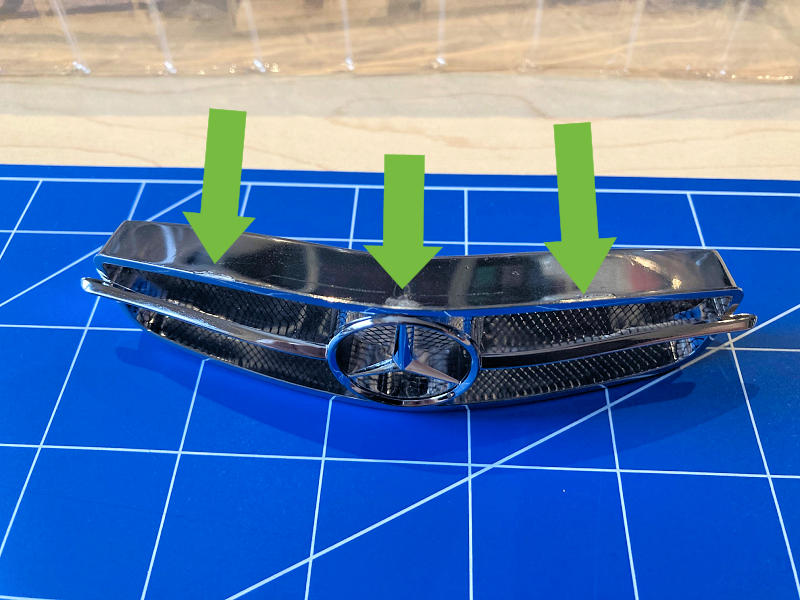
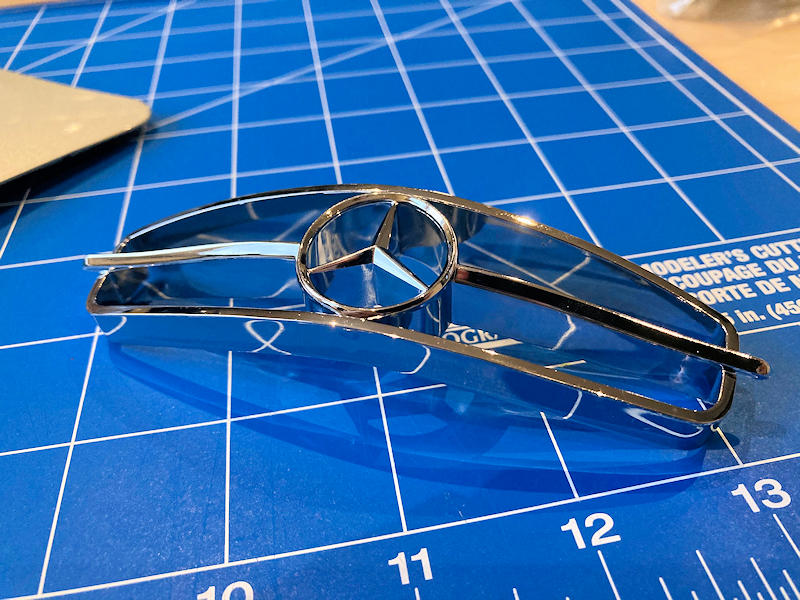
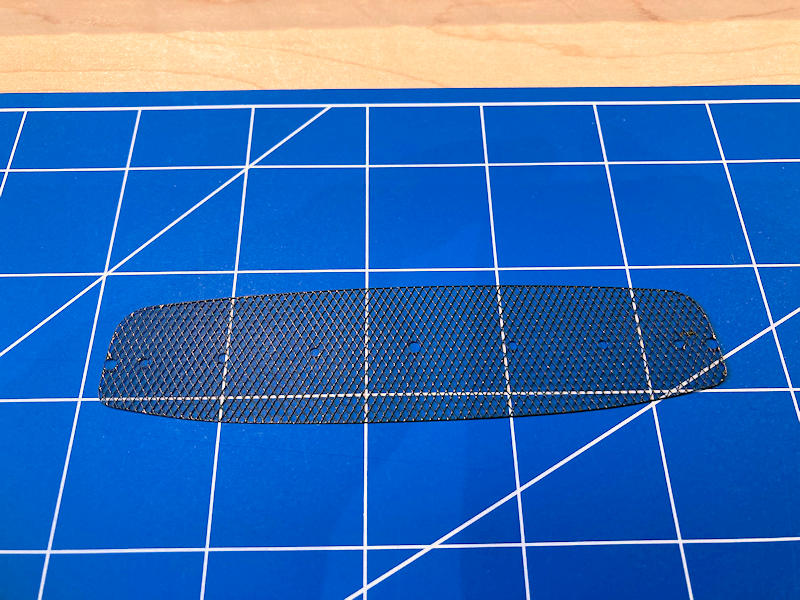
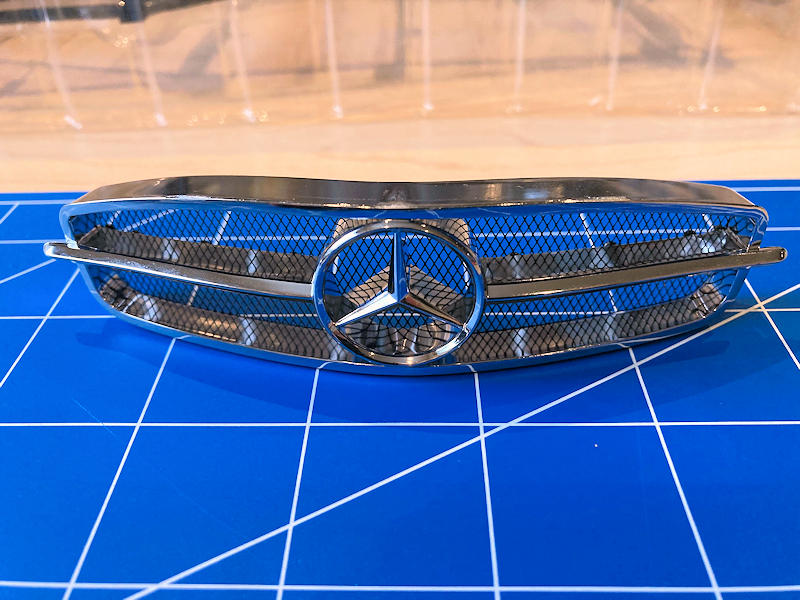
Assembling the front grill is quite easy. Simply secure seven screws. As for the chrome finish, definitely solid. What concerned us somewhat was the finished work around the edge – there are three rough patches where the part we believe was clipped from the mould. Hopefully, there is zero concern with the grill once it is inserted into the body/frame.
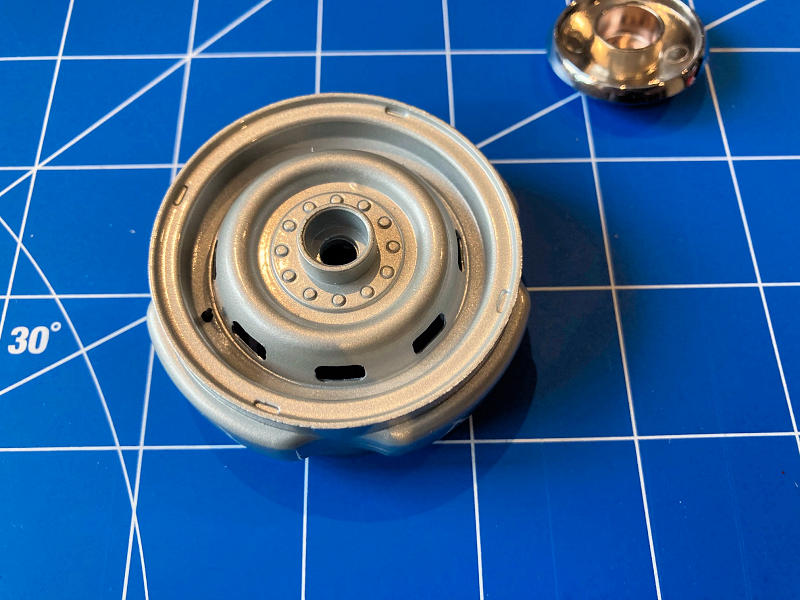
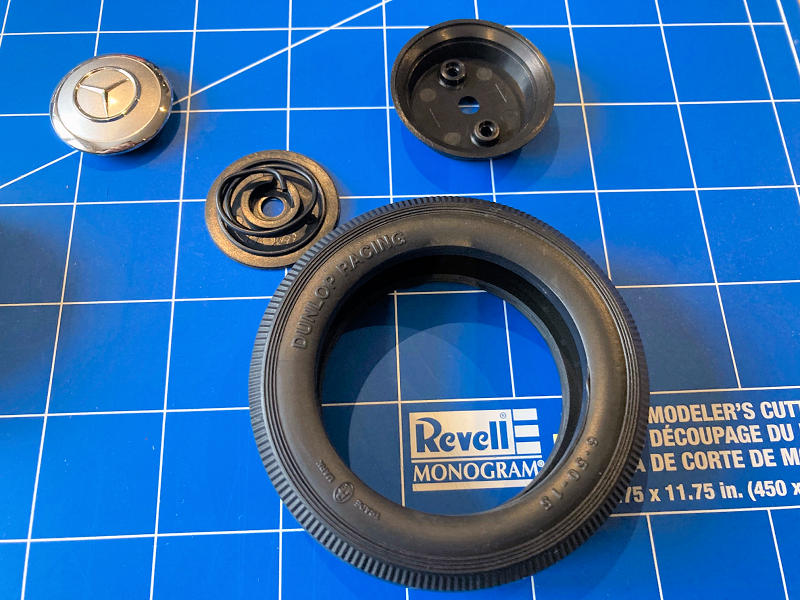
FRONT LEFT WHEEL
A straightforward task as per the instructions. Note, where it recommends placing the tire into hot water is true; it works. However, you don’t need to boil water. Straight from your tab after a few seconds on hot is more than sufficient. Add the tire to hot water and wait 2-3 minutes, remove, quickly dry the access and mate the tire to the rim with ease.
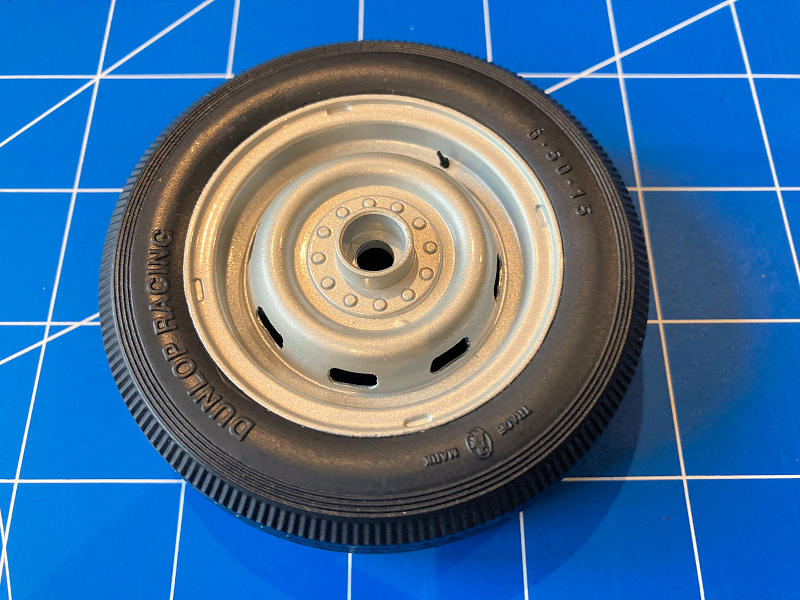
We absolutely love the fact that the rims are fabricated in metal. Definitely as to the charm of the build. The Mercedes-Benz hub-cap (see photos below) is a beautiful piece, too, though it is set aside until later in the build. Tires are made of hard plastic. This is a good thing; once this model is 100% assembled, the weight on the four corners will be considerable. The hard plastic will ensure longevity and help reduce flat spots.
GUIDE #2:
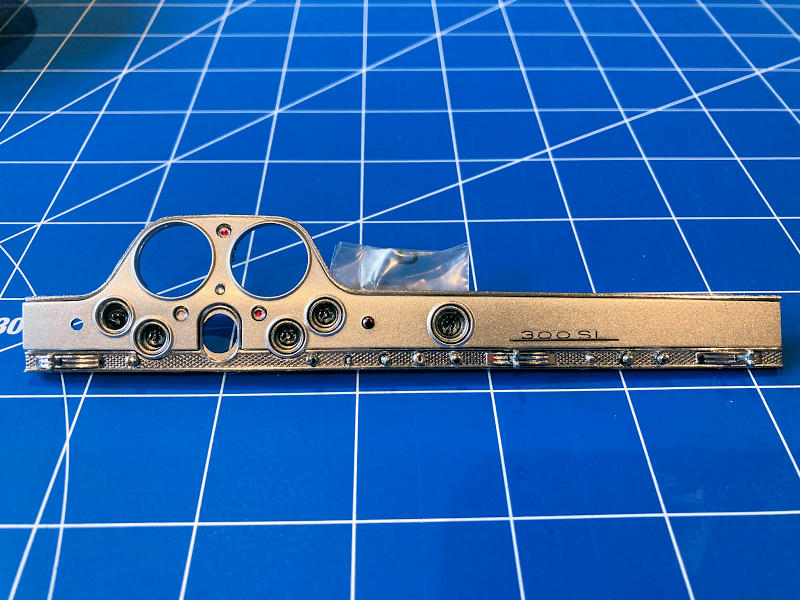
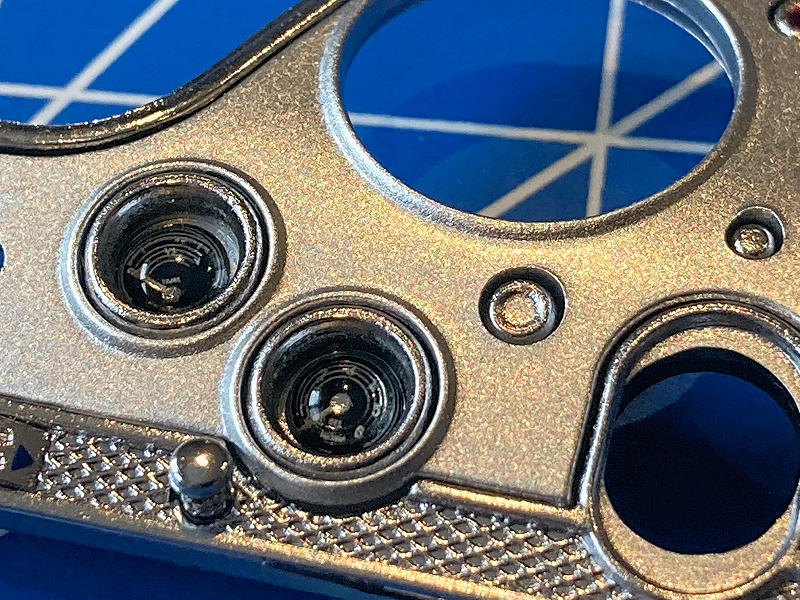
INSTRUMENT PANEL
Again, follow the simple instructions, secure five screws in total.
TIP: Do not over-tighten them!

The interior section of the dash is a work of art if you ask us! The detail is present in the overall finish, knobs, buttons and textures. The gauges, though they are installed, have a glass cover, very authentic. Also, the steering wheel is part of the parts package, though not installed until later in the build. It is quite astonishing how it actually folds like the original!
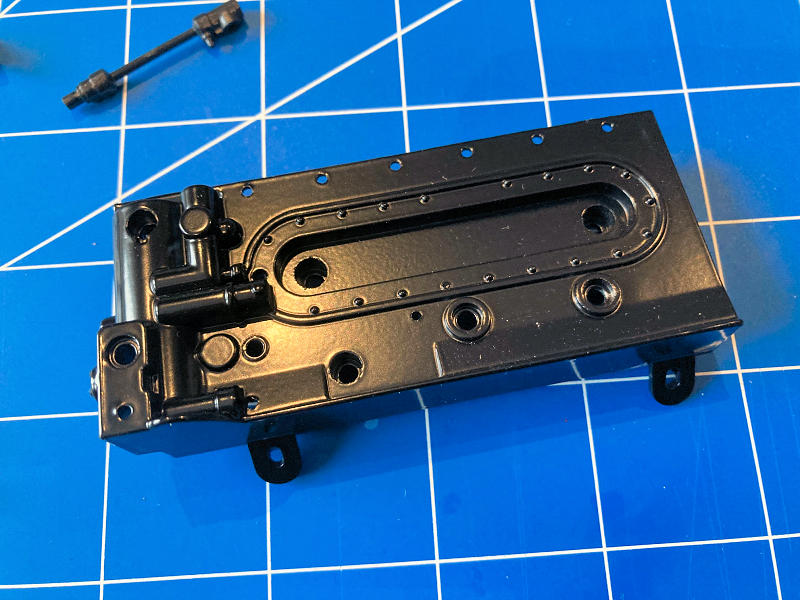
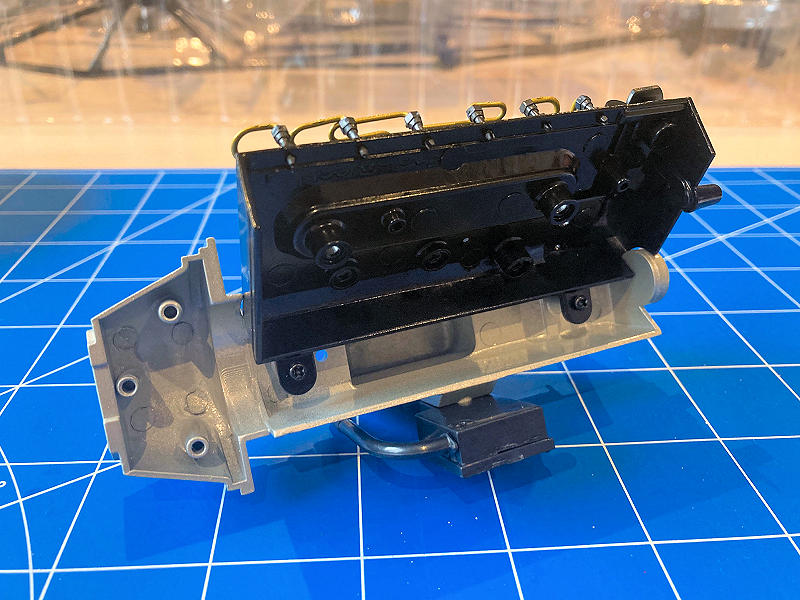
ENGINE BLOCK
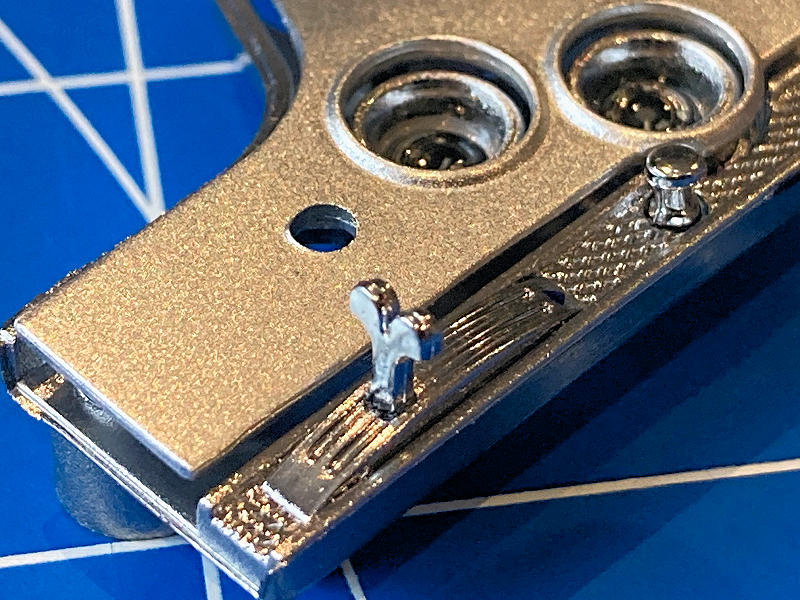
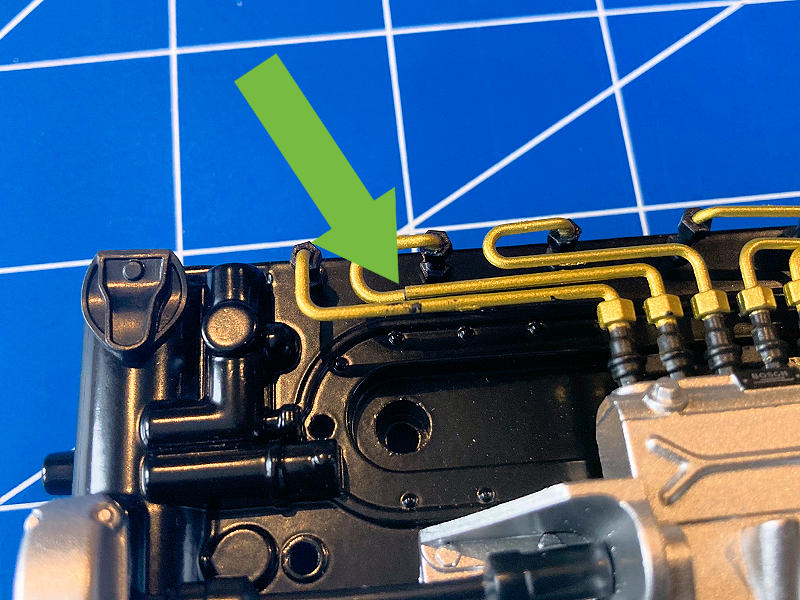
We would consider this section the most intricate piece of the build to date. The left side of the engine block is fabricated in metal. As for the various steps here, all is relatively straightforward. Each section goes together without pause. Well, until we got to the Fuel Injection Pipes… LOL.
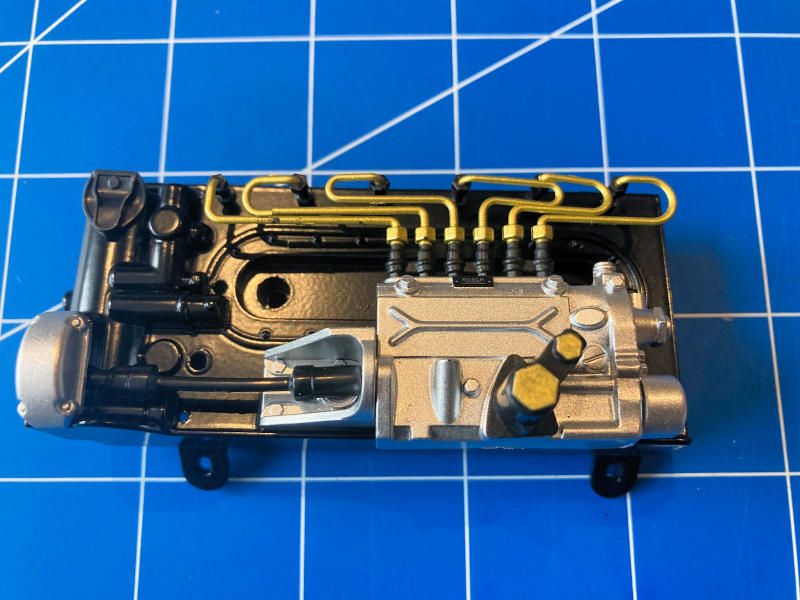

Here, the instructions say to use the supplied tweezers to help facilitate the process. Well, that did not work. What did work was positioning the connection point on the holes and pushing down in between the fittings with a small flat-head screwdriver, as shown above.
TIP: On a side not,e we did break one of the three Fuel Injection Pipes during install, so be careful here!
FRONT BUMPER
Directions here are once again clear and concise. Installing the bumper supports and overriders is straightforward. This includes the license plate, too.
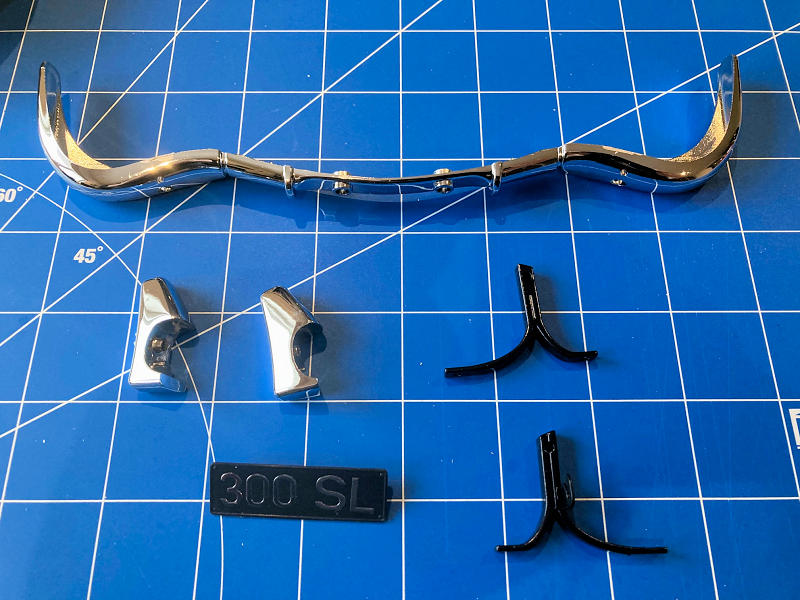
The bumper itself is fabricated in plastic, though the rear supports and front left and right bumper overriders are all metal. The front bits are truly gems, and the chrome work throughout is definitely on point.
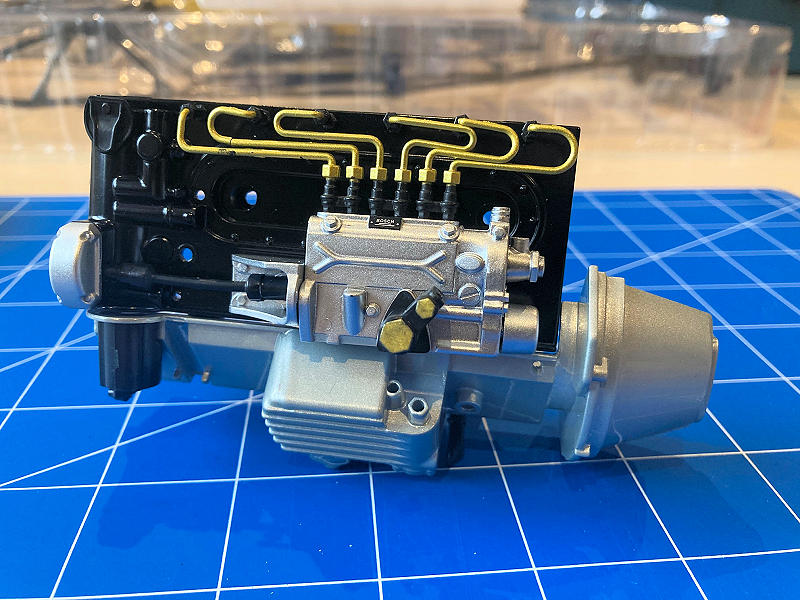
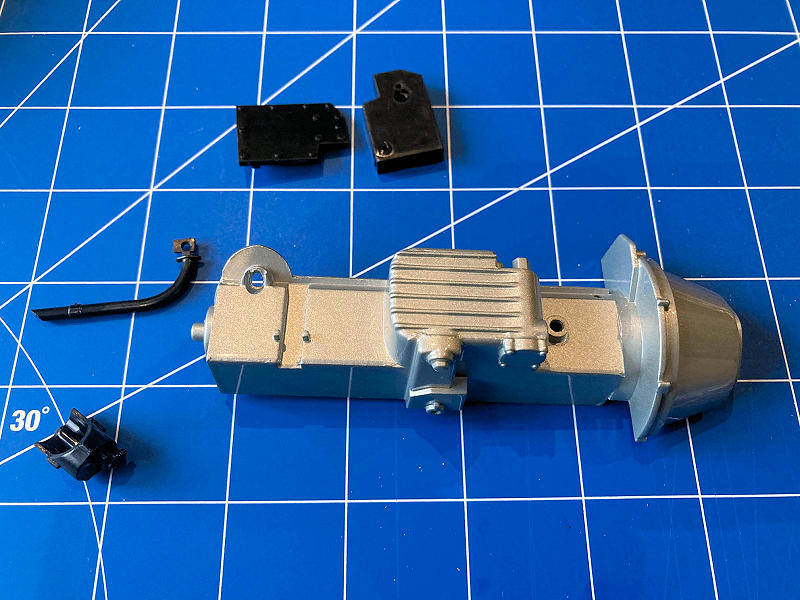
CRANKCASE
The final part of instruction guide #2 comprises the crankcase and left block mating. Once again, the assembly is straightforward with one exception. Nothing serious, the tank (oil radiator) required a little filing to get the pipe (oil radiator to seat properly). This was completed in seconds.

The crankcase pictured above is another all-metal component. The remaining parts for this step were all fabricated with plastic material.


Question? The wheel you show appears to be a Rudge knockoff wheel, but hubcaps are mentioned and shown rather than knockoffs. Is there a possibility that there is an knockoff option?
Hi, answer below.
To answer P930 question, the answer is No -knockoffs are not offered. My subscription has started on this ; but there are paint quality issues with the hood [dust and paint run] -when reported to Eaglemoss a replacement will be sent in 2-3 weeks. I suspect the entire model will need a repaint-the roof is s separate piece so there will be a seam there the roof meets the main body.
Sorry to hear you problems with the exterior paint. The hood is the only piece on the exterior body we have received in the initial box. It looks flawless. Let’s hope the remaining parts arrive the same. Our journey will be documented based on what we experience, and for the record it is the only first-hand experience we’ve had with this brand.
Not everyone has the ability to re-paint, though I know there are many they will and will also take many other elements of the design to the next level. It’s encouraging they have acknowledged your request and are sending you a replacement part. The holidays are certainly not helping with delivery.
This is looking pretty good! I’m in the process of building the 1/8 scale DeAgostini Ford GT40 MkI Lemans 1969 winner. The process is similar to what is shown here with a subscription type of build at ModelSpace (US). The finish is flawless on the body parts I already have and the fit of everything is also very good. Body is metal, the wheels also. A lot of the interior is plastic, but is of good quality. No painting involved either here and the finish of the parts are good enough to leave alone. This is a fun build, the lights will turn on and I just installed a speaker in the car’s door sill… I’m guessing it will have sound as well.
I just completed guides 3 & 4, I will post something shortly. Definitely is agreement with the above; I did however discover a slight issue with the guide during the assembly of the motor. I will highlight in Part 3.
Lights are added bonus with the MB 300 SL though there are no additional sound effects, which I personally am okay with. Not sure is this is part of the other builds on their list? Possibly.
Any idea as to what’s going on with the parts delays. Hearing that EM is pulling the plug on this and the Aston Martin soon.
Can’t help you here. Though we did receive Guide Booklet 6-7 with parts to carry on with our MB 300 SL build today.